How is Leather Made? A Step-by-Step Guide of the Leather Tanning Process
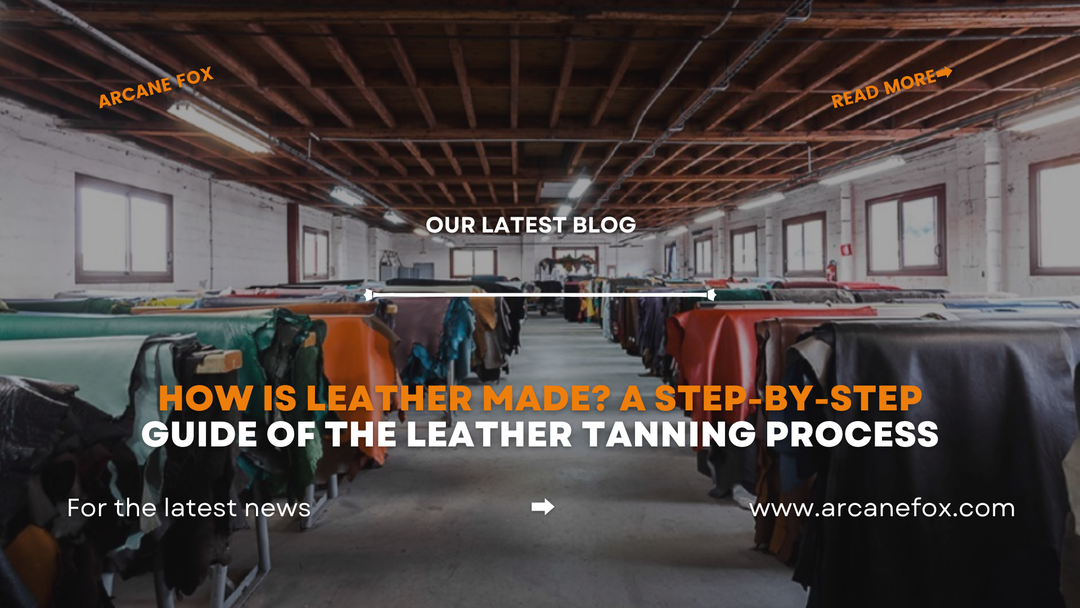
How is Leather Made? A Step-by-Step Guide of the Leather Tanning Process
Leather is an extremely popular material that has been used for thousands of years. Most people possess anything made from leather and have at some point gotten intrigued about how it is made.
Tanning is the process of converting animal hides and skins into leather. Tanning consists of up to 25 processes divided into four phases: beamhouse, tannyard, retanning, and finishing. Leather tanning can take anything from a few days to months, depending on the procedure employed. Leathers can come in a variety of colors, textures, and finishes.
Given how prevalent leather is, it's intriguing to learn about the many procedures used in leather production and tanning. It's also fascinating how some of the procedures used today are the same as they were thousands of years before. Let's start with some background information, then move on to the 25 stages themselves.
1. How is Leather Made?

Making leather is a lengthy process that takes years to master and perfect. It takes quite a few stages to transform raw hide into strong, durable, and elegant leather products. There are also other processes for making leather, which entail changing rawhide into leather.
Of course, simplifying the leather-making process reduces it to three steps. The initial step is to prepare the animal skin, then tan it, and finally complete the leather items. However, in this post, we will focus solely on the tanning process. To be honest, the tanning process is the most important aspect of leather production. This is the step at which the actual change happens. It is where animal skin changes into something wonderful.
For many centuries, the tanning process transformed animal skin into useful products such as clothing, shoes, and tools. Even though it is an ancient art, you can manufacture and tan your own leather with a little knowledge and a lot of patience and effort.
2. Methods of Making Leather

Vegetable tanned leather is still very common today, though the procedures for producing it have grown considerably more polished and industrial. Even yet, vegetable tanning is a laborious process that can take weeks or months to produce a finished leather product.
The demand for leather goods has grown over time. As technology advanced, so did the demand for a leather tanning technique that was faster than vegetable tanning. This speedier procedure is referred to as "chrome tanning," which is short for chromium tanning.
Chrome tanning takes only a few days and gives you far greater control over the quality of the finished leather. This has made it popular among the leather production business, since it allows them to make leather faster and to the essential requirements. Chrome tanning is highly chemically driven. Vegetable tanning can be done with a variety of chemicals or with natural methods.
In today's more advanced operations, workers typically pipe or pour the chemical solutions needed for each step into massive rotating drum containers. They dump the containers into pipes or nearby drainage sites before refilling them with the next solution. This process eliminates the significant cost of maintaining a separate set of drums for each tanning stage and avoids the hassle of regularly shifting the hides between different drums during tanning. It makes the procedure more efficient.
3. What Exactly is Leather Tanning?

Tanning is simply the process of preparing the animal's skin or hide to produce leather. The tanning procedure normally takes place at a leather tannery. A tannery, like the one in Morocco, is typically large-scale. It includes several drums that can tan hundreds of animal skins at once. Furthermore, the tannery in Morocco is really old. It demonstrates that tanning and leather manufacture are an ancient art form. Similarly, two ancient civilizations, Sumer and India, have practiced leather tanning for thousands of years.
Additionally, tanning is not only an ancient art form. While the animal skin takes the tanning substance, it undergoes chemical and physical changes. The final output is leather, but not all of it will be of the same quality. This is because tanning includes a variety of techniques and approaches. Each approach, procedure, or solution given to the leather will create a unique result. As a result, learning about the leather tanning process is both interesting and vital.
4. Why Do We Need to Tan Leather?
Now that we have a general understanding of what leather tanning is, the next question we must ask is "why". Why do we have to tan leather? The simplest response is "to make leather". But that's not enough. Why do we need to tan animal skin to make leather? What is the tanning process that converts ordinary animal skin into leather? Why tan the animal skin in the first place?

The answer is rather straightforward. It prevents the animal skin or hide from rotting, decomposing, or putrefying. Once the animal has died, the skin will naturally degrade. There are numerous components that typically break down and disintegrate the animal skin. It could be caused by bacteria that eat away at the flesh, elements that try to harden the skin, or both. Tanning, therefore, stops all of this from occurring.

Tanning irreversibly alters the protein structure of the animal's skin. It will make the skin more resilient and less prone to decomposition. Different solutions cause different changes to the skin. Color, flexibility, softness, and strength can all alter. However, no matter what method or technique you utilize, the fundamental goal of tanning is to protect the skin. Tanning maintains the animal skin while also producing leather. Furthermore, tanning not only preserves but also protects the skin against the environment. Protecting it from decomposition when moist.

5. Different Methods of Tanning Leather
Tanning is an ancient form of art, and many people have devised various methods or procedures for it. There are several methods for tanning animal skin or hide. However, two approaches are the most popular. There are two tanning methods: vegetable tanning and chrome tanning (chromium tanning). We will also briefly explore various alternative tanning procedures.
5.1 What is Vegetable Tanning?

Vegetable tanning is a traditional method that has been used for centuries. It involves soaking cleaned animal hides in natural tannins, which are derived from the bark and leaves of trees. The hides are placed in pits or drums with tannin solutions of increasing strength, and the process takes two to three months. As the tannins slowly penetrate the skin, the leather develops a distinct color, texture, and a natural, woody fragrance.
Natural tanning can also occur under specific environmental conditions, like in bogs, where acidic water, low oxygen, and cold temperatures help preserve the skin. This results in a deep tan, similar to that found in ancient mummified bodies. The process happens naturally without additional chemicals.
Another traditional method is brain tanning, which is labor-intensive and often used for hides of animals like deer or moose. The tanner cleans the hide, then applies a mixture of warm water and mashed animal brain tissue to tan the skin. Afterward, the hide is stretched and smoked to finish the tanning process, giving it a unique finish.
Get the full story on vegetable-tanned leather—the process, the benefits, and why it’s a timeless choice—click here: What is Vegetable Tanned Leather? - It's Origins, Process, and Expert Care Tips
5.2 What is Chrome Tanning?

Chrome tanning, a more modern method compared to the ancient practice of vegetable tanning, is now one of the most widely used techniques for tanning leather. It involves two main stages. First, you soak the animal hides in acidic salt baths to prepare them for the next step. In the second stage, you place the hides in a bath containing chromium agents like chromium sulfate. As you gradually reduce the acidity, the hides absorb the chromium, resulting in "wet blue hides," named for their bluish tint.
One major advantage of chrome tanning is speed. While vegetable tanning can take several months, chrome tanning can be completed in as little as a day with modern equipment. Additionally, chrome tanning is less labor-intensive and therefore more cost-effective, making it a popular choice for producing leather efficiently.
Learn all about chrome-tanned leather—its quick process, durability, and what sets it apart in the leather industry—click here: What is Chrome-Tanned Leather? - Its History, Process, and More
5.3 What is Synthetic Tanning?

Synthetic tanning is often used as an alternative to chrome tanning but is usually combined with other methods, like vegetable or chrome tanning. It relies on artificial agents such as formaldehyde, glutaraldehyde, phenols, and acrylates. The resulting leather, known as "wet white," can also be produced using a mix of aldehydes, aluminum, zirconium, titanium, or iron salts. This method produces very soft leather, commonly used for car seats.
Mineral tanning is another process that uses chromium salts to speed up tanning, sometimes reducing the time to just hours or days. It results in soft, flexible leather that is lightweight and durable.
Tawing is a traditional method using alum and aluminum salts, often combined with binders like egg yolk or flour. This technique enhances the skin's softness, stretchability, and overall quality, making it more pliable.
6. Overview of Leather Tanning Process
As we progress, we'll look at the steps involved in the contemporary tanning process used to produce leather. Some are common to both vegetable-tanned and chrome-tanned leathers. Some are slightly different. Soon, you'll be able to identify the leathers used in some of your favorite products and determine how they were created.
The tanning process is made up of 4 major phases; beamhouse, tannyard, retanning, and finishing. Let's check them out! Some of the steps may sound familiar (for example, dyeing, finishing, or grading).
7. Tanning Phase 1 of 4 - Beamhouse

The phrase "beamhouse" refers to the first part of the leather tanning process. This phase largely focuses on preparing the raw hide (hide that has recently been taken from an animal) for the tanning process. Holding a piece of leather, it's wonderful to consider all of the steps involved in tanning and the journey it has taken. This is the beginning.
It's also worth noting that a piece of leather may be referred to as a "hide" or a "skin". The difference is usually determined by the size of the animal from which the piece originated. Leather from larger animals, such as deer and cows, is known as "hides". Leather from smaller animals, such as rabbits, is known as "skins".
6.1 Step 1 - Curing

First, the hides must be "cured", or kept. A leather piece begins with a recently skinned animal hide. Because of viral proliferation, it can begin to disintegrate and decay in as little as 5 hours.
After around 11-12 hours, more major degradation of the hide starts. This natural process must be halted so that the hide may be transported to the tannery. There are several methods for curing a hide.
Sun Drying
This is the earliest procedure, dating back to the beginnings of leather tanning. Drying involves putting the hide out in the sun and letting it dry. When it dries, the decomposition process stops, and the hide is kept.
This technique is not optimal because it often only works in warm climates with little humidity. In addition, dried in the sun leather can be of lesser quality. This is due to hide degeneration resulting from over- or under-drying, as natural drying can be influenced by a variety of environmental conditions.
Freezing
Hides can be put into a freezer to stop the decaying process. This works rather rapidly. However, freezing temperatures and the resulting expansion of water molecules when frozen can cause structural damage to the hide. This results in inferior leather down the line. Furthermore, frozen hides would have to remain frozen all the way to the tannery, making refrigerated shipping and storage a logistically difficult and expensive means of preserving hides.
Dry Salting
The hide is thoroughly soaked in fresh salt before being hung to dry. As the air rushes around it, the salt drains a large amount of water from the hide. This is similar to the traditional method of preserving meats by salting them. The hides become tough and resistant to bacterial growth after being salt-cured. They can remain in this state until they are ready to transport.
Wet Salting
This approach involves soaking the hide in a highly concentrated salt solution. Similar to dry salting, it takes moisture out of the hide while limiting bacterial growth and curing it. Wet salting is generally an encouraged procedure, and the hides that result from wet salting perform better later in the tanning process when they undergo exposure to water again for processing.
Controlled Drying
Controlled drying works similarly to sun drying, but usually produces more uniform and high-quality leather. This is owing to the capacity to better regulate the environment in which the hides are stored, often in a temperature and humidity controlled drying chamber. However, the costs of constructing and maintaining the heating, cooling, dehumidification, and airflow associated with this configuration are significantly higher.
6.2 Step 2 - Storing

Tanneries are normally separate from the facilities that treat and cure raw animal hides. As such, the storage of cured hides becomes really important before they are shipped.
Storage procedures will vary depending on the curing process. Frozen hides will require freezer storage. Dry salted hides should be kept in a low-humidity environment, away from insects and vermin. Hides can be stored individually or in bulk bundles ready for shipment.
6.3 Step 3 - Shipping
Shipping may be more urgent or not, depending on the curing procedure utilized. For example, freezing-cured hides will have to be given in freezer trucks. This will require a rather precise logistical arrangement.
Dried and salted hides can last for several months. This simplifies transportation procedures and allows skins to be delivered to tanneries farther distant for further processing.
If shipped hides are well-cared for during storage, they will be in excellent condition and ready for sorting when they arrive at the tanner.
6.4 Step 4 - Sorting/Trimming

In this process, hides are sorted based on a variety of variables, including weight and quality. It is critical to understand what a hide will eventually be used for in order to guarantee that it has the potential and qualities to meet the requirement.
Additionally, hides are trimmed during this process to remove any unnecessary or severely damaged areas. This ensures that only necessary and useful parts proceed to the next processing steps.
Scraps and trimmings can be discarded or used for less refined processing needs.
6.5 Step 5 - Soaking/Washing

Before soaking, the raw skins are salted and very stiff, which helps to prevent bacteria and mold growth. However, they are not very functional or pliable in their current state. Soaking in water removes the salts and restores moisture to the hide. This provides for flexibility and further treatment during tanning.
This additional moisture increases the possibility of bacteria growth during soaking, thus several chemicals, including disinfectants, can be applied at this stage to assist prevent this from occurring. Chemicals can also be added to the wash to help it absorb water faster. As the washing progresses, the hides will be largely free of most salts and dirt.
Washing usually takes place in huge vats or rotating drums with a high volume of leather for efficiency. After washing, they are very wet, supple, and ready for the next phase.
6.6 Step 6 - Liming

The liming stage presents methods for removing many of the organic compounds that may still be present in the hide. These will not be required later in the processing or desired in the finished product. These mostly include the epidermis, hair roots, and any more unwanted lipids or soluble protein.
In this phase, an alkali (a saline base that dissolves in water) and a combination of various additives (cyanides, amines, sulfides, etc.) serve to cure the hide and aid in the elimination of superfluous materials. This involves weakening the hair, adding more proteins, lipids, collagens, and so on; basically, anything other than the ideal and useful hide material.
During liming, the hides are placed in big vats or bins similar to those used for washing. Liming also increases the alkalinity of the hides to a pH of around 12. If some hides choose to retain their hair on, the skin side is treated with a substance that aids in the cleaning and removal of hair from that side only, keeping the hair-side intact.
6.7 Step 7 - Fleshing/Unhairing (Scudding)

Once limed, the hide is ready for the excision of unwanted areas. They have been weakened by the liming procedure, so unhairing can proceed. This is often accomplished mechanically using machines, rollers, and blades. It can also be performed using hand tools and scraping/scudding. The manual method is quite labor-intensive.
After being unhaired, the hide can be fleshed. This entails removing the hide's epidermal layer as well as the hair roots (known as "scudding"). Scudding is normally done automatically, however it can also be done by hand.
The highest-quality portion of the hide is now all that is left after it has been thoroughly cleaned and readied for tanning, when it will be transformed into leather. This is the final step in the Beamhouse phase. The hide has already come a long way and is ready for the Tanyard step.
7. Tanning Phase 2 of 4: Tanyard

Tanyard refers to the second major stage of the leather tanning process. This phase focuses mostly on transforming the prepared hides (cleaned, disinfected, and free of hair and the outer skin layer) into usable leather pieces. Here is where the leather is "made"!
Some of the steps will differ depending on whether the leather is being tanned with vegetable or chrome tannins. Vegetable tanning usually has fewer phases because it is a simpler process. Chrome tanning requires a few extra stages, but it also gives the tanner more possibilities for the desired end effect for the hides.
7.1 Step 8 - Bating (Deliming and Buffering)

Buffering salts are used to reduce the PH at this step of the leather tanning process. Buffering basically reverses the results of the prior liming operation, hence the term "deliming."
This is critical because the enzyme agents (which can be chosen based on the desired end state and eventual usage for the leather) are more effective at a lower pH. These chemicals enhance the leather's suppleness and pliability. This process is known as bating.
The following phase is the first in which we can perceive the difference between modern vegetable tanning and chrome tanning procedures.
7.2 Step 9 - Pickling (only for chrome tanning)

Pickling is only done on hides that will be chrome-tanned. This is because chromium tanning agents are insoluble in the previously developed alkaline environment. Pickling reduces the chrome tanning PH to approximately 2.
This entails treating the hides with salts and subsequently sulfuric acid (when mineral tanning is done). Pickling decreases the PH of collagen in the hide to a very low level, allowing tanning chemicals to penetrate the hide. Salt is frequently chosen over acid because it penetrates the hide faster and helps mitigate the detrimental consequences of an abrupt drop in PH.
At this stage, the skins are ready for tanning, which is the fun part! Pickling is unnecessary for vegetable tanned leather because the tannins used in vegetable tanning can function correctly at higher PH levels.
7.3 Step 10 - Tanning

To prepare and tan leathers, early tanning techniques often used harsh and foul-smelling ingredients. Tanneries were frequently located outside of towns and away from people owing to the odor. Today, we'll take a closer look at the two basic procedures for tanning leather: vegetable tanning and chrome tanning. We will also briefly discuss different chemical tanning procedures.
Vegetable Tanning
This is the oldest known common approach, and it makes use of tannins (natural astringents) made from plants and bark. In raw skins, tannins bond to and coat the collagen. This reduces their susceptibility to bacterial growth, decreases their water solubility, and increases their flexibility.
Depending on the procedure utilized, vegetable tanning might take anywhere from 2 days to 30 days or more.
Tanners often do this in large pits or revolving drums that agitate the leather within the tanning mixture. Throughout the process, they expose the hides to increasingly intense quantities of tannins. They use the following barks to extract tannins in this process:
- Chestnut
- Hemlock
- Mangrove
- Oak
- Redoul
- Wattle
- Mimosa
Vegetable tanning provides a variety of colors, including yellows, browns, and even reds. Because it is a more natural process, the outcomes can be distinct and frequently quite appealing. While vegetable tanning produces softer leather than raw hides, it is still quite tough and rigid, making it ideal for saddlery, luggage, tooling leather, sheaths, and belts.
Chrome Tanning
Chrome (chromium) tanning is extremely popular and effective. It was introduced around 1858, and due to chromium's characteristics, it produces a soft, thin leather. Unlike the tannins used in vegetable tanning, chromium binds to the collagen in raw hides, increasing the space between proteins in the hide. This increases their stretchability and resistance to shrinkage in warm water.
The chromium ions are also much smaller than those found in tannins, allowing them to permeate rawhide more quickly. A chemical bath far more sophisticated than water is required to soak the hides and activate the chromium in such an effective manner.
However, the entire process can take less than a day. This is commonly done in a "one-bath" approach with a low pH (2-4). This procedure involves milling the hides in a single solution until tanning is complete.
Leather tanned with the chromium process may have 4%-5% chromium in the substance. In the end, this is a considerably speedier procedure than vegetable tanning, takes less effort, and produces softer, stretchier leather.
Other Chemical Tanning
Other chemicals, such as chrome tanning, can be utilized to treat leather's collagen. Furthermore, because chromium can be detrimental to the environment in some cases, efforts have been made to replace it in the tanning process. Some of these include:
- Aldehydes
- Titanium
- Iron salts
- Zirconium
- Aluminum
Each of these yields leather with slightly different characteristics. Which of these could be used for a specific tanning run would be determined by the desired end use, material preferences, and cost/time variables.
7.4 Step 11: Wringing/Drying

During tanning, the hides soak in various solutions and absorb a large amount of moisture. So, after tanning, the hides are dry. In most cases, this happens by pressing the leather through huge, heavy rollers to remove moisture.
It can also be done with vacuum suction through huge steel plates, which is set up in specialist apparatus. After squeezing out extra water, the leather is dry and ready for the next step.
7.5 Step 12: Splitting
Now that the leather has been tanned, it must be worked according to its planned final use. Some leathers in thinner products, such as gloves or wallets, are extremely thin. To get the desired thickness, the leather must be split.
Splitting leather is the process of cutting leather longitudinally (in thickness) into thinner layers. Also, each hide has numerous natural layers. This needs to be considered when separating. A splitting machine with rollers and blades is used to slice the thick hides into many layers, depending on preference.
Different layers of the original hide remain after splits, depending on the cut. Here's a look at the most typical splits and how they behave after fully processed.
Full Grain Leather
This cut of leather preserves the hide's outside arrangement, known as the "grain"; it has not been sanded or cleaned to remove any defects. The grain often includes densely packed finer fibers, resulting in a surface that is exceptionally robust, durable, and can endure heavy use. This makes it ideal for saddlery, footwear, and furniture. Because the outer coating is not removed, it develops a patina (a change in surface color caused by wear) over time that can be attractive to the sight. Full Grain is regarded as the highest quality leather available.
Top Grain Leather
This cut is very similar to full-grain, but the very top layer has been sanded and/or buffed to remove faults and inconsistencies in the surface. This softens and pliableizes the leather, which then receives various dyes and finishes. Because of its suppleness and flexibility, top grain leather is commonly used in high-end leather products such as handbags, jackets, wallets, and shoes.
Genuine (Corrected/Split-Grain) Leather
Genuine leather can come from any layer of the hide and undergoes treatment on the surface to provide a more uniform appearance. It can be sanded or rubbed to remove surface defects before being dyed (or spray painted) or stamped/embossed for a finished appearance. The technique affects some of the preferred properties of leather, thus while it is not of high quality, it is commonly used for belts and other such items.
Bonded (Reconstituted) Leather
Bonded leather, often known as scrapple or hot dogs, is produced from finely cut leather scraps glued together with polyurethane or latex onto a fiber mesh or sheet. The percentage of leather in the mix can vary substantially (from 10% to 90%), influencing the functional and aesthetic aspects of the final product. Bonded leather is frequently painted to add color, and it can also be pressed or embossed to simulate a specific grain or leather style.
7.6 Step 13: Shaving

Once split, hides can be shaved to further adjust their thickness. Shaving removes smaller amounts of leather than cutting. When splitting or shaving completely dry leather, a large amount of leather dust might be produced.
8. Tanning Phase 3 of 4: Retanning

It was successful! The leather has already been tanned and has made the long trip from rawhide to a quality, usable material. At this point in the tanning process, the hide has been stable, treated, and refined. Generally, for efficiency, the Retanning methods take place in order within a single rotating drum, with washing and drying steps in between.
Many of the more physical attributes and chosen properties of the leather can now be changed further, depending on the intended use of the finished product. These may include softness, flexibility, pliability, density, and color. During the Retanning phase, the leather truly comes to life. But we only tanned the leather. What is re-tanned leather, and why should we re-tan?
Chrome tanned hides that have specific preferences for softness or flexibility may be retanned to further refine those features. Before coloring. Chromium-tanned leather has a pale blue tint. So, once the tanning processes are complete, this sort of leather is virtually usually dyed.
8.1 Step 14 - Bleaching/Dyeing/Coloring

Leather is frequently colored, dyed, or bleached to achieve a variety of appealing appearances. Dyes can be water soluble or oil based, with water soluble dyes having superior material penetration and reaching deeper into the fibers.
Dyeing differs from painting in that the latter applies a top coat of color that does not permeate the fibers. Other materials/conditioners can be added to the dye to influence the leather's qualities, such as softness, flexibility, and storage life.
In general, vegetable tanned leather is not dyed; its appealing look is due to the natural leather color and tannins employed in the processing. There are four major categories of dyes available:
Acid Dyes
Acid dyes provide bright, vivid colors. They blend with the hide's basic (in PH terminology) constituents. The longer the dye is exposed to the hide, the deeper the color penetration will be. This is a dependable method of leather dyeing.
Basic Dyes
Basic dyes provide very brilliant colors with good color consistency. They combine with the leather mostly because of their positive electrical charge. Acid dyes are typically utilized more than basic colors.
Direct Dyes
Direct dyes are synthetic dyes. They require a more particular PH range from the hide when applied to ensure smooth and equal coloring. These dyes are less brilliant than Basic or Acid dyes.
Sulfur Dyes
Sulfur dyes provide various advantages for hiding colors. In general, they penetrate the hide quite well, producing a deep, even color. They are also less susceptible to water and light than other dyes. This allows the finished material to retain its desired properties for longer after it is utilized in production and transformed into leather goods.
Dyes can be blended to produce a desired shade. Bleaching can also be used to neutralize color pigments, if you prefer a lighter-toned hide.
8.2 Step 15 - Fatliquoring
Until this time, the hides had been tanned, polished, and colored. All of this contributes to the material's stability and desirable qualities. However, it can leave the leather feeling dry and stiff.
Fatliquoring is the process of applying lubricants to leather to increase its strength and flexibility. Depending on the required properties of the produced leather, a wide range of compounds can be used during Fatliquoring. Mineral oils, natural fats, synthetic fats, and synthetic oils are all possible options. At this point, the leather is really coming to life.
8.3 Step 16 - Setting
In methods that will involve air drying, the hides are now ready to be laid out to dry. This process must be completed correctly to ensure that the prior treatments produce an even overall finish over the hide.
When setting, hides are typically stretched or placed to expose all surfaces to airflow. The more homogeneous the drying is across the hide, the more consistent the finished result will be. In operations where mechanical drying will be used, the hides are loaded into machines for the following stage.
8.4 Step 17 - Drying
After setting, you dry the hides. To remove moisture, you typically press the leather through large, heavy rollers. You can also use vacuum suction through large steel plates set up in specialized equipment.
If you air-dry the hides, you usually do this in a facility where temperature and humidity are regulated with proper airflow. Drying can also be done in a large drying loft. Mechanical drying is widely used because it is quick and efficient. Once dry, the leather is ready for finishing.
9. Tanning Process 4 of 4: Finishing

Finishing is the final element of the leather tanning process. We've covered the majority of the steps needed in making leather. These next few steps mostly focus on improving the leather's unique properties for its intended purpose.
The finishing stages can dramatically alter the appearance of leather skins. In certain situations, additional materials cover the leather underlying, resulting in surface finishes that look and behave considerably differently than the original leather.
9.1 Step 18 - Conditioning
This phase involves applying conditioners to the leather. This allows them to retain some essential moisture and oils, which will maintain the leather healthy, flexible, and supple over time.
The type of conditioner will vary depending on the leather. It can be applied mechanically or manually.
9.2 Step 19 - Staking/Dry Milling
Staking is similar to tenderizing meat using a mallet. The leather is mechanically battered to lighten its grain. This helps to make it a smoother, more supple material, which is ideal for leather products and accessories.
Staking can be done manually in low volume or individual tanner manufacturing, but it takes a long time and requires a lot of labor.
9.3 Step 20 - Buffing
Buffing the hide creates a more visually pleasing grain side while also making it smoother to the touch. Buffing with a sanding drum. This stage smoothes the grain side while also producing a lot of leather dust from the sanding.
A variety of surface abrasion processes can be employed to polish the leather. These can include buffing with special paper to assist create a nubuck or suede finish, as well as wheels with various materials to add a sheen or shine to the leather's surface.
9.4 Step 21 - Surface Pressing

This is where leather can truly take on a new look and feel. During surface pressing, massive machinery with rollers or presses can imprint a pattern into the leather. This produces a rough or patterned appearance on the surface.
Surface pressed or embossed leathers include Saffiano, Palmetto, pebbled, and micro-grain leather. Because these pressings are unique designs, there is essentially no limit to the number of various surface pressings that can be performed.
The unique design of the surface press can also enhance the performance of the leather. For example, the pattern of pressed diagonal rows on Saffiano leather makes it generally tough and scratch/abrasion resistant.
Surface pressing is one method for giving a leather a distinctive appearance while also improving its performance. Surface finishing allows for even greater control over the look, feel, and performance of leather before it hits the market. Let's find out what that is.
9.5 Step 22 - Surface Finishing

At this point, the leather is highly refined, tailored, and capable of serving very particular functional needs. Yet, there is more! Surface finishing enables refinement at an even more specialized level.
Finishes are applied to the leather to provide specific properties that protect or enhance its wearability. Waxed surface treatments, such as those seen on Saffiano leather, are one example. The translucent wax hardens the exterior surface (making it scratch-resistant), repels water, and protects the leather and color underneath. For products that will be carried/used frequently, this is an excellent way to increase the life and quality of a leather item.
Finishes can also include:
- Solvents—for surface treatment and protection.
- Binders - that help to adhere the finish to the leather.
- Plasticizers - give the outside surface a lustrous, patent leather appearance.
- Pigments - are additional coloring on top of the leather hue.
- Specialized waxes - for surface hardening and protection.
In most facilities the finishes are applied by one of a few methods:
- Pads - soaked in the finishing material, mechanically apply the finish to the leather surface.
- Flow Coating - The finish solution is pumped into a holder above the leather. It then runs down onto the leather, spreading across the surface.
- Spraying - The finishing solution is sprayed onto the surface of the leather.
Some tanneries manually apply the finish with pads, but machines usually perform this task more effectively. After coating, they dry the completed surfaces. The chosen type of finish determines how they cure the leather. Some surfaces are dried in ovens, while others are air-dried on large shelves that allow air to circulate evenly over the entire hide.
Surface finishing, while toward the ending of the tanning production line, produces dramatically different-looking end results. Some surfacing finishes are legally protected under intellectual property and patent law because they are distinct design components that are critical to an organization's product and brand identity. Examples include luxury handbags, luggage, and leather products.
At this phase, modest trimming of the hides may be made to achieve more polished edges and to remove any excess bits or wayward parts.
9.6 Step 23 - Grading
After surface treatment, the hides are nearly ready for usage. The pieces will be thoroughly inspected during a quality control process at the tannery. Each will receive a grade. The item is judged for quality based on numerous elements, including:
- Surface Properties
- Thickness
- Color/Pattern Consistency
- Overall Feel and Look
- Flexibility/Softness
Once graded, the tanner understands the exact quality of the finished product. This permits it to be correctly classified when posted for sale.
9.7 Step 24 - Measuring
Finally, you measure the graded leather hide to determine both its size and thickness (in ounces). Leather thickness influences how you will use the material in the final product.
Leather thicknesses usually range from about 1oz (1/64", 0.4mm) to 20oz (5/16", 8mm). You use thinner leathers for products like gloves and wallets, while thicker leathers are used for items like bags and belts.
The size of the hide is also essential because it determines what projects the leather will be suitable for. You typically use larger hides for bigger projects, while smaller hides are used for smaller tasks.
Of course, you can combine multiple smaller hides to form a larger surface. However, if the goal is to build something with consistent color and material properties, larger hides are undoubtedly better. You can use the hide whole or cut it into smaller pieces.
You must carefully consider the size and thickness of a hide when categorizing it for sale or selecting it for use.
After measuring, the final hide is ready! Yes, the leather is complete! Time to celebrate—it's come a long way, but there’s still one more step left.
9.8 Step 25 - Shipping
Now that the tanner has created an exquisite piece of leather (which will undoubtedly be used in an extraordinary project), it must be delivered to the purchaser.
The tanner may wholesale the leathers to merchants, where customers might purchase them. They may also sell directly to the customer. In any case, the leather must be tightly packed at this stage.
After all of the hard work, safeguarding the leather during transportation is critical. Tanned leather is rather durable, but you should keep it out of excessive temperatures and humidity during transit. Treat it with a non-abrasive substance to prevent surface damage from abrasions during shipping. It has come so far! Definitely keep it secure now!
10. Pros and Cons of the Leather Tanning Process

10.1 Pros:
- Durability: Leather produced through tanning is strong, durable, and long-lasting, making it ideal for high-quality products like furniture, shoes, and accessories.
- Aesthetic Appeal: The tanning process gives leather a rich texture, beautiful colors, and a natural patina that develops over time, making it visually appealing and versatile for fashion and design.
- Versatility: Tanning allows leather to be used in a wide range of industries, from automotive and upholstery to fashion and industrial goods, due to the different finishes and types of leather it can produce.
- Natural Materials (Vegetable Tanning): Vegetable tanning uses natural tannins from plants, making it a more eco-friendly and traditional method compared to chemical alternatives. This process produces leather with a natural, earthy fragrance and appearance.
- Soft and Flexible (Chrome Tanning): Chrome tanning, the more modern method, creates softer, more pliable leather in a shorter time. This makes it ideal for mass production and products requiring flexibility like garments and handbags.
- Increased Efficiency: Modern tanning processes, especially chrome tanning, can produce leather quickly and cost-effectively, reducing the production time from months to days.
10.2 Cons:
- Environmental Impact (Chrome Tanning): Chrome tanning involves the use of harmful chemicals like chromium salts, which can lead to pollution if not properly managed. Waste disposal and water contamination are major concerns.
- Time-Intensive (Vegetable Tanning): While eco-friendly, vegetable tanning is a slow process, often taking several months to complete. This makes it less efficient for mass production and can increase the cost of the final product.
- Cost: High-quality, vegetable-tanned leather is more expensive due to the labor-intensive process and the need for skilled artisans. This can make products made from vegetable-tanned leather less accessible to consumers.
- Complexity: The leather tanning process involves many steps, from preparing and cleaning hides to tanning and finishing. Each step requires precision, which can lead to higher costs and production challenges.
- Health Risks: Workers in tanneries, especially those dealing with chemicals like chromium, may face health risks if proper safety precautions aren’t followed. Long-term exposure to tanning chemicals can be harmful.
- Limited Color Options (Vegetable Tanning): Vegetable tanning offers fewer color options compared to chrome tanning, which can limit its use in fashion and design that require vibrant, consistent colors.
11. Final Words
The leather tanning process is a fascinating combination of ancient techniques and modern advancements that transform raw animal hides into a durable, flexible, and beautiful material. Whether through the traditional vegetable tanning method or the faster chrome tanning process, the journey from rawhide to finished leather involves numerous steps that each play a vital role in creating the final product. The choice of tanning method depends on factors like time, cost, and desired leather quality, but all approaches have their unique advantages and challenges.
Natural methods like vegetable tanning provide a rich, environmentally friendly leather with a distinct texture and fragrance, while chrome tanning offers a quicker, more cost-effective solution for large-scale leather production. Synthetic alternatives and traditional methods like tawing further expand the possibilities for leather crafting, providing endless variations for different industries and uses.
Understanding the tanning process helps not only in appreciating the craftsmanship behind leather goods but also in making informed choices about the types of leather we use. Whether you're looking to darken leather quickly with oils or exploring sustainable, natural tanning methods, the versatility of leather remains unmatched. From fashion to furniture, leather will continue to be a timeless material, evolving with both tradition and technology.
Related Posts:
- What is Cowhide Leather? Origins, Types, and Maintenance
- What is Goatskin Leather? Different Types of Goatskin, Quality, Durability and More
- What is Sheepskin Leather? Everything You Need To Know
- What is Lambskin Leather? The Ultimate Guide on Quality, Durability and More
- What is Exotic Leather? Origins, Types, Care, and more
- What is Calfskin Leather? It's Quality & Durability Against Other Leather!
- What is Buffalo Leather? - It’s Uses, Care, and Comparison with Other Leather
- What is Horse Leather? - It's Durability, Uses, and Caring Tips
- What is Kangaroo Leather? & It’s Strength, Production, and Uses
- What is Pig Leather? & Why it is a Strong and Versatile Choice for Your Projects
- What is Deer Leather - It's Softness, Strength, and Different Types